
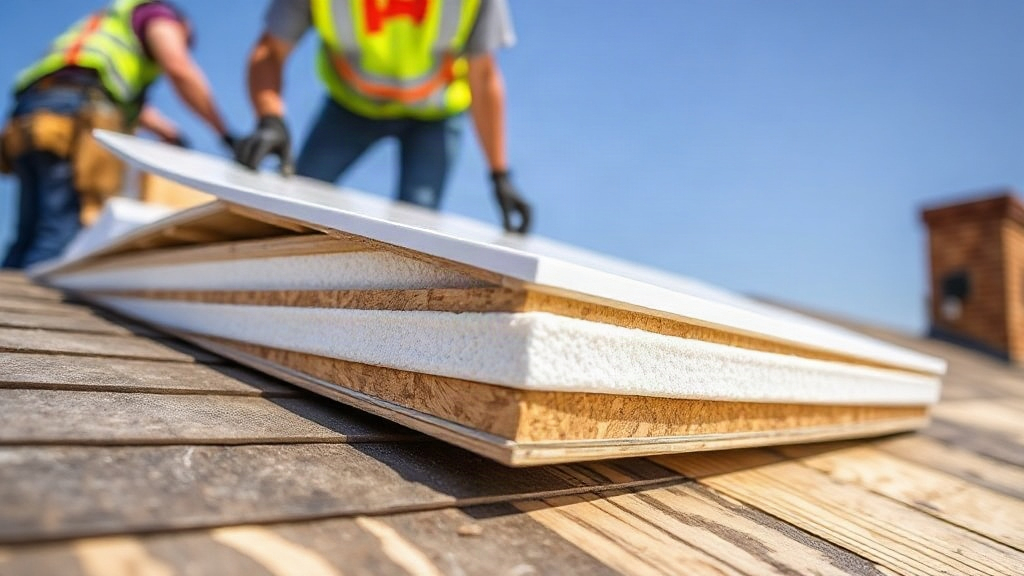
When it comes to roofing, the choice of materials can make or break your project. Among the many options, Expanded Polystyrene (EPS) roof panels have gained popularity for their excellent insulation properties, lightweight nature, and ease of installation. But to ensure a successful outcome, you need to understand both the specifications of these panels and the proper installation techniques. In this guide, we'll walk you through everything you need to know about Panel Installation & Specs for EPS roof panels, from selecting the right thickness to sealing the final seam.
What Are EPS Roof Panels?
EPS roof panels are structural insulated panels (SIPs) that consist of a core of expanded polystyrene foam sandwiched between two layers of oriented strand board (OSB) or plywood. The EPS core provides exceptional thermal insulation, while the skins offer structural strength. These panels are used in both residential and commercial roofing applications, often as part of a warm roof system.
Key Components of an EPS Roof Panel
- EPS foam core: The insulating layer, available in various densities and thicknesses.
- Structural skins: Typically OSB or plywood, bonded to the foam core.
- Adhesive: Industrial-grade glue that bonds the skins to the core.
- Edge profiles: Tongue-and-groove or shiplap edges for tight connections.
EPS Roof Panel Specifications
Before installation, it's crucial to understand the specifications of EPS roof panels to ensure they meet your project's requirements. Here are the key specs to consider:
Thickness and R-Value
EPS panels come in various thicknesses, typically ranging from 4 to 12 inches. The R-value, which measures thermal resistance, increases with thickness. For example, a 6-inch panel might have an R-value of around 24, while a 10-inch panel can reach R-40. The right thickness depends on your climate and energy goals.
Panel Sizes
Standard panel sizes are 4 feet by 8 feet, but custom sizes are available. Larger panels mean fewer seams, which can improve energy efficiency and reduce installation time.
Compressive Strength
EPS foam typically has a compressive strength of 10-15 psi, which is sufficient for roof loads when combined with structural skins. However, for areas with heavy snow, you may need higher-density foam.
Fire Ratings
EPS panels can be treated with fire retardants to meet building codes. Look for panels with a Class A fire rating for optimal safety.
Code Compliance
Ensure the panels meet local building codes, including those for structural integrity, fire safety, and energy efficiency. Check for certifications like ICC-ES reports.
Installation Process for EPS Roof Panels
Installing EPS roof panels is a systematic process that requires careful planning and execution. Here's a step-by-step guide:
1. Preparation and Safety
Before you start, gather all necessary tools and safety equipment, including gloves, safety glasses, and fall protection. Ensure the roof deck is clean, dry, and structurally sound. Check for any protruding nails or debris.
2. Layout and Cutting
Plan the layout of the panels to minimize waste and ensure proper alignment. Start from one corner and work your way across. Measure and cut panels as needed using a circular saw with a fine-tooth blade. Remember to cut with the foam side down to avoid tear-out.
3. Lifting and Placing Panels
Due to their size, EPS panels are heavy and require at least two people to lift. Place panels onto the roof, ensuring the tongue-and-groove edges align. Use spacers to maintain a small gap between panels for expansion.
4. Fastening Panels
Fasten panels to the roof structure using screws or nails. Drive fasteners through the panel skins into the rafters or purlins. Follow the manufacturer's recommendations for fastener spacing, typically 6 inches on edges and 12 inches in the field.
5. Sealing Joints
Apply sealant or foam adhesive to the tongue-and-groove joints to create an airtight seal. This step is critical for preventing air leakage and moisture infiltration.
6. Finishing the Roof
Once all panels are installed, you can apply your chosen roofing material, such as shingles, metal, or membrane. Ensure proper flashing around penetrations and edges.
Tips for a Successful Installation
- Acclimate panels: Let panels sit on the roof for 24 hours before installation to adjust to temperature and humidity.
- Use proper fasteners: Choose screws with washers to distribute load and prevent pull-through.
- Check for level: Ensure the roof deck is level to avoid gaps and uneven surfaces.
- Seal penetrations: Use flashing and sealant around chimneys, vents, and skylights.
- Follow manufacturer guidelines: Always adhere to the panel manufacturer's installation instructions for warranty compliance.
Common Mistakes to Avoid
Even experienced installers can make mistakes. Here are some common pitfalls to avoid:
- Improper spacing: Not leaving gaps for expansion can cause buckling.
- Inadequate fastening: Using too few fasteners can lead to panel uplift in high winds.
- Poor sealing: Skipping sealant on joints can result in energy loss and moisture damage.
- Ignoring code: Failing to check local building codes can lead to failed inspections.
Frequently Asked Questions
What is the typical R-value of EPS roof panels?
EPS roof panels typically have an R-value of about 4 per inch of thickness. So a 6-inch panel would have an R-value of approximately 24. Higher thicknesses yield higher R-values, making them suitable for cold climates.
Can EPS roof panels be installed over an existing roof?
Yes, EPS roof panels can be installed over an existing roof if the structure can support the additional weight. However, it's often recommended to remove the old roofing to inspect the deck and ensure proper installation.
How do I cut EPS roof panels?
Use a circular saw with a fine-tooth blade or a reciprocating saw. Cut with the foam side down to prevent chipping. For straight cuts, a straightedge can help. Always wear safety glasses and a dust mask.
What is the lifespan of an EPS roof panel?
With proper installation and maintenance, EPS roof panels can last 50 years or more. The EPS foam does not degrade over time, and the structural skins are protected by the roofing material.
Do I need a vapor barrier with EPS roof panels?
In most cases, EPS roof panels do not require an additional vapor barrier because the foam itself acts as a vapor retarder. However, in very cold climates, a vapor barrier may be recommended on the interior side to prevent condensation.
Conclusion
EPS roof panels offer a winning combination of insulation, strength, and ease of installation. By understanding the specifications and following proper installation techniques, you can achieve a durable, energy-efficient roof that will serve you for decades. Whether you're a DIY enthusiast or a professional contractor, this guide provides the foundation for a successful project. For more detailed information and high-quality EPS roof panels, visit EPS Roof Panels.