
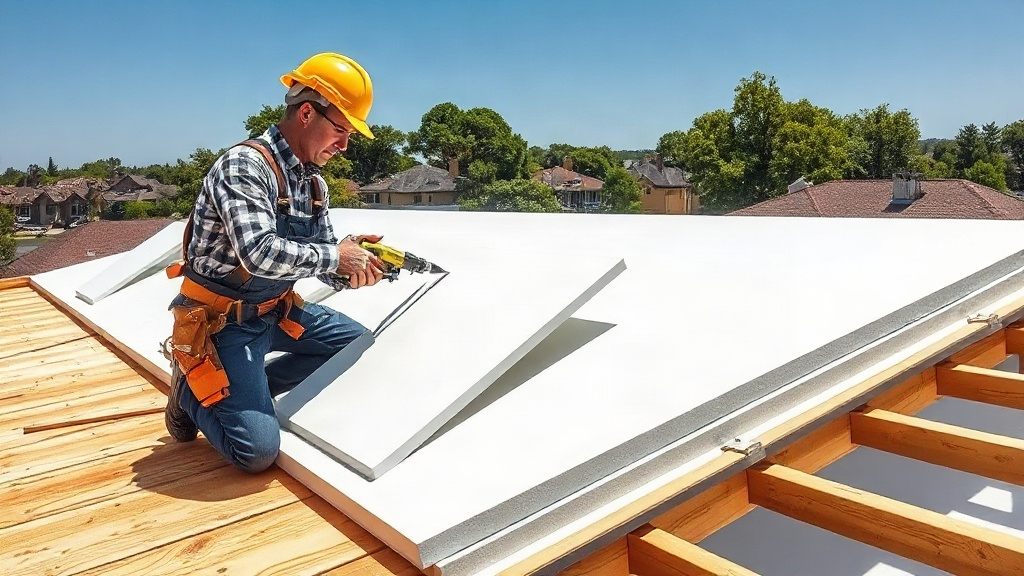
When it comes to roofing, EPS panels have become a go-to choice for builders and homeowners alike. They offer excellent insulation, are lightweight, and can significantly reduce energy costs. But to get the most out of them, you need to get the Panel Installation & Specs right. This guide walks you through the entire process, from understanding the technical details to executing a flawless installation. Whether you're a seasoned contractor or a DIY enthusiast, these insights will help you achieve a roof that performs beautifully for years.
Understanding EPS Panels: What They Are and Why They Matter
EPS, or Expanded Polystyrene, is a rigid foam insulation material known for its exceptional thermal performance. When used in roof panels, it's typically sandwiched between two layers of oriented strand board (OSB) or plywood, creating a structural insulated panel (SIP). These panels are engineered to provide both insulation and structural support, making them a smart alternative to traditional roofing systems.
The core benefits are clear: EPS panels are lightweight, which makes them easier to handle and install than heavier materials like concrete or some composite panels. They also offer high R-values, meaning they resist heat flow effectively. This translates to lower heating and cooling bills and a more comfortable indoor environment.
Key Specifications to Check Before You Buy
Not all EPS panels are created equal. Before you purchase, you need to verify a few critical specs to ensure they meet your project's needs.
- Thickness and R-Value: EPS panels come in various thicknesses, typically ranging from 2 to 12 inches. The thicker the panel, the higher the R-value. For most residential roofs, an R-value between 20 and 40 is common, but check your local building codes for minimum requirements.
- Density: EPS density is measured in pounds per cubic foot (pcf). Standard densities are 1.0, 1.5, and 2.0 pcf. Higher density means greater compressive strength, which is important for load-bearing applications.
- Compressive Strength: This indicates how much weight the panel can support before deforming. For roof panels, a minimum of 15 psi is often recommended, but higher values are better for areas with heavy snow loads.
- Panel Dimensions: Standard panel sizes are 4 feet by 8 feet, but custom sizes are available. Make sure the panels fit your roof layout to minimize cutting and waste.
- Fire Rating: EPS panels should have a fire rating, typically Class A or B. Check local fire codes for compliance.
Ignoring these specs can lead to poor performance, structural issues, or failed inspections. Always request technical data sheets from your supplier and compare them against your project requirements.
Step-by-Step EPS Panel Installation
Installing EPS roof panels is a systematic process that requires careful planning and execution. Here's how to do it right.
1. Preparation and Safety
Before you start, ensure your roof deck is clean, dry, and structurally sound. Remove any debris, nails, or old roofing material. Check for any soft spots or damage and repair them. Safety is paramount: wear appropriate gear, including gloves, safety glasses, and non-slip boots. Use fall protection if working at heights.
2. Measuring and Planning
Measure your roof area accurately to determine how many panels you need. Create a layout plan that minimizes cuts and ensures panels are staggered for strength. Remember to account for overhangs and ridges. It's wise to order 10% extra for waste and future repairs.
3. Substrate Preparation
EPS panels can be installed over various substrates, including plywood, OSB, or existing roof decks. Ensure the surface is flat and free of protrusions. If you're installing over an existing roof, consult a professional to ensure it can handle the added weight. For new construction, install a vapor barrier if required by your climate zone.
4. Panel Placement and Fastening
Start at the bottom edge of the roof and work your way up. Apply a bead of construction adhesive to the substrate before placing each panel. This adds stability and reduces squeaks. Press the panel firmly into place. Fasten the panels using screws or nails designed for EPS, typically 8 to 12 inches on center along the edges and 12 inches in the field. Be careful not to overdrive the fasteners, as this can crush the foam core.
Ensure panels are tightly butted together. Use a mallet to gently tap them into place if needed. For a continuous insulation layer, you can apply a foam sealant at the joints.
5. Sealing and Finishing
Once all panels are installed, seal all joints, seams, and penetrations with a high-quality sealant or tape designed for EPS. This prevents air and moisture infiltration. For roof applications, you'll then install your chosen roofing material, such as shingles, metal, or membrane. Follow the manufacturer's instructions for the specific roofing type.
Finally, inspect the entire installation for any gaps or loose fasteners. Address any issues immediately to avoid future problems.
Common Mistakes to Avoid During Installation
Even experienced installers can make mistakes. Here are some pitfalls to watch out for:
- Improper Fastening: Overdriving screws can damage the panel's integrity. Always set your drill clutch to the correct torque.
- Poor Sealing: Skipping sealant at joints can lead to air leaks and reduced energy efficiency.
- Ignoring Expansion: EPS panels expand and contract with temperature changes. Leave a small gap (about 1/8 inch) between panels to allow for movement.
- Using the Wrong Adhesive: Some adhesives can degrade EPS. Use only adhesives approved for use with polystyrene.
- Not Staggering Panels: Staggering panels like bricks adds strength and prevents continuous seams.
By avoiding these mistakes, you'll ensure a durable and efficient roof.
Frequently Asked Questions
What is the typical R-value of EPS roof panels?
EPS panels have an R-value of approximately 4.0 per inch of thickness. So a 4-inch panel would have an R-value of around 16. However, actual performance can vary based on density and manufacturer. Always check the product data sheet for specific values.
Can I install EPS panels over an existing roof?
Yes, in many cases, EPS panels can be installed over an existing roof, provided the structure can support the additional weight and the existing roof is in good condition. Consult a structural engineer to be sure. It's often more cost-effective to remove the old roof first.
How do I cut EPS panels?
EPS panels can be cut with a variety of tools, including a circular saw with a fine-tooth blade, a handsaw, or a hot wire cutter. For straight cuts, a straightedge helps. Always wear a dust mask to avoid inhaling foam particles.
What type of roofing can be installed over EPS panels?
EPS panels are compatible with most roofing materials, including asphalt shingles, metal roofing, and single-ply membranes. However, you must follow the roofing manufacturer's guidelines for installation over foam insulation. Some may require a separate underlayment or specific fasteners.
How long do EPS roof panels last?
With proper installation and maintenance, EPS roof panels can last 30 years or more. The foam core is resistant to moisture and decay, and the structural skins are durable. However, the overall lifespan also depends on the roofing material on top and regular inspections.
By following this guide, you're well on your way to a successful EPS panel installation. Remember, the key to a long-lasting roof is in the details: accurate specs, careful installation, and thorough sealing. If you're ever unsure, don't hesitate to consult a professional. Your roof is too important to cut corners.